
Nginx reverse proxy — three words that show up in every modern server setup, and for good reason. Whether you are running a Node.js app, a Docker container, a Python API, or a full-blown microservices architecture, chances are you need something sitting in front of your application that handles SSL, distributes traffic, caches responses, and hides your backend from the public internet. That something is almost always Nginx.
We have been running Nginx as a reverse proxy in production for years — in front of Shopware stores, Next.js apps, API gateways, and containerized services. This guide is not the Nginx documentation rewritten in friendlier language. It is the practical knowledge from hundreds of real deployments, including the mistakes that cost us hours at 2 a.m. and the configurations that actually survived traffic spikes.
By the end of this article, you will understand exactly how Nginx works as a reverse proxy, how to set it up from scratch, and how to configure it for production with SSL, load balancing, caching, WebSocket support, and security hardening.
Is Nginx a Reverse Proxy?
Yes — and it is one of the best at it. While Nginx started as a web server designed to solve the C10K problem (handling 10,000 concurrent connections), its reverse proxy capabilities quickly became its most popular feature. Today, a significant portion of Nginx deployments worldwide use it primarily or exclusively as a reverse proxy rather than as a traditional web server serving files from disk.
The key distinction: Nginx is not only a reverse proxy. It is a web server, a reverse proxy, a load balancer, a mail proxy, and an HTTP cache — all in one binary. But its event-driven, non-blocking architecture makes it exceptionally good at the reverse proxy role specifically, because proxying is fundamentally about managing connections efficiently, and that is exactly what Nginx was built for.
What Is a Reverse Proxy and How Does Nginx Handle It?
A reverse proxy sits between clients (browsers, mobile apps, API consumers) and your backend servers. Instead of clients connecting directly to your application, they connect to the reverse proxy, which then forwards the request to the appropriate backend, receives the response, and sends it back to the client.
Why “reverse”? A regular (forward) proxy sits in front of clients and forwards their requests outward — think corporate firewalls or VPNs. A reverse proxy does the opposite: it sits in front of servers and handles incoming requests on their behalf.
This guide assumes Nginx is already decided. If you’re one level below that and want the vendor-neutral picture first — what a reverse proxy actually is, how it differs from a load balancer, an API gateway and a CDN, and when you don’t need one at all — start there and come back here afterwards.
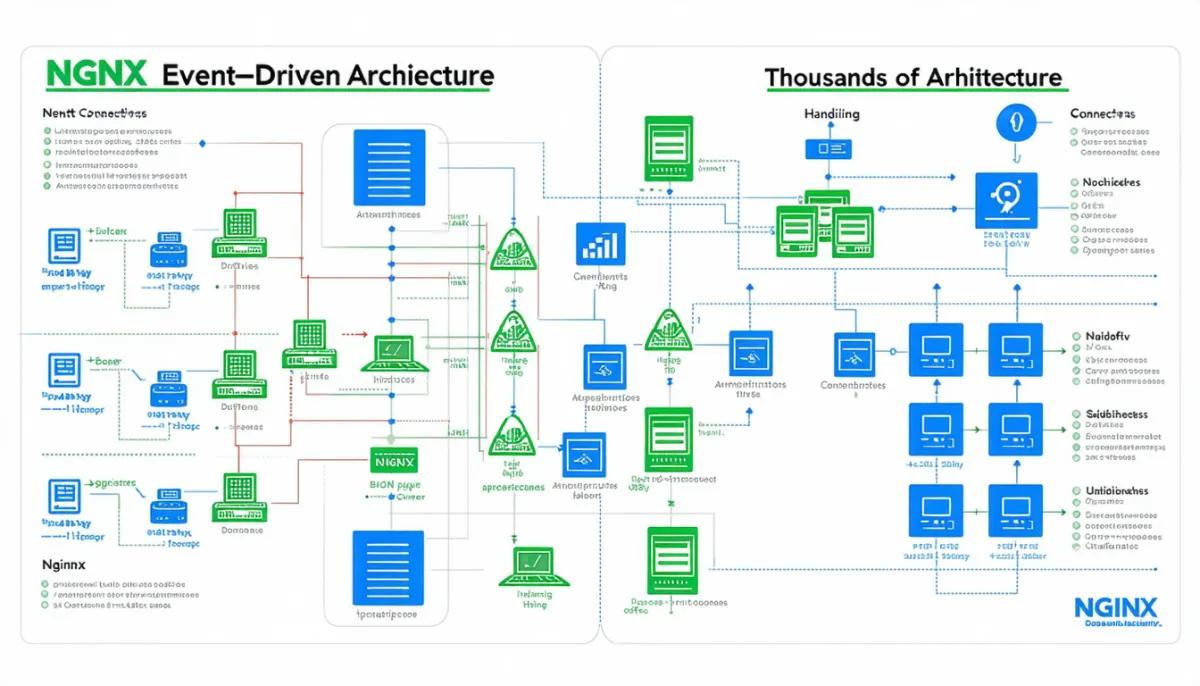
What Nginx does as a reverse proxy:
- Receives all incoming HTTP/HTTPS requests on ports 80 and 443
- Terminates SSL/TLS so your backend applications do not need to handle certificates
- Routes requests to the correct backend based on domain name, URL path, headers, or other criteria
- Load balances across multiple backend instances
- Caches responses to reduce backend load
- Compresses responses (gzip/brotli) before sending them to clients
- Buffers requests and responses to protect slow backends from slow clients
- Adds security headers, rate limiting, and access controls
- Hides your backend infrastructure from the public internet
The beauty of this architecture: your backend applications can focus purely on business logic. They listen on localhost, they do not deal with SSL, they do not worry about slow clients holding connections open. Nginx handles all of that.
How Nginx Works as a Reverse Proxy: The Architecture
Understanding the internals helps you configure Nginx properly and debug issues when they arise.
Event-Driven, Non-Blocking I/O
Traditional web servers like Apache (in its default prefork mode) spawn a process or thread for each connection. This works fine at low scale but becomes expensive when you have thousands of concurrent connections — each process consumes memory even while waiting for I/O.
Nginx takes a fundamentally different approach. It uses an event-driven architecture with a small number of worker processes (typically one per CPU core). Each worker uses non-blocking I/O and an event loop (epoll on Linux, kqueue on BSD) to handle thousands of connections simultaneously within a single process.
For reverse proxying, this is perfect. Most of a proxy’s time is spent waiting — waiting for the client to send the request, waiting for the backend to respond, waiting for the client to acknowledge the response. Nginx can efficiently multiplex all this waiting across thousands of connections without wasting resources.
The Request Flow
When a request hits Nginx configured as a reverse proxy, here is what happens:
- Connection accepted — the worker process accepts the client connection via the event loop
- Request parsed — Nginx reads and parses the HTTP request headers
- Server block matched — based on the
Hostheader andlistendirective, Nginx picks the rightserverblock - Location matched — the URL path is matched against
locationblocks - Upstream connection — Nginx opens (or reuses) a connection to the backend server
- Request forwarded — the client request is sent to the backend, potentially with modified headers
- Response received — the backend response is read (and optionally buffered/cached)
- Response sent — the response is sent back to the client
- Logging — the request is logged according to the configured log format
This entire flow is non-blocking. If the backend is slow, Nginx does not tie up a thread waiting — it simply handles other connections and comes back when the backend has data ready.
Step-by-Step: Setting Up Nginx as a Reverse Proxy
Let us go from a fresh Linux server to a working reverse proxy. We will use Ubuntu/Debian commands, but the Nginx configuration itself is identical across distributions.
Step 1: Install Nginx
sudo apt update
sudo apt install nginx -y
sudo systemctl enable nginx
sudo systemctl start nginx
Verify it is running:
curl -I http://localhost
# Should return HTTP/1.1 200 OK
Step 2: Basic Reverse Proxy Configuration
Let us say you have a Node.js application running on port 3000. Here is the simplest possible reverse proxy configuration:
# /etc/nginx/sites-available/myapp
server {
    listen 80;
    server_name myapp.example.com;

    location / {
        proxy_pass http://127.0.0.1:3000;
        proxy_set_header Host $host;
        proxy_set_header X-Real-IP $remote_addr;
        proxy_set_header X-Forwarded-For $proxy_add_x_forwarded_for;
        proxy_set_header X-Forwarded-Proto $scheme;
    }
}
Enable it:
sudo ln -s /etc/nginx/sites-available/myapp /etc/nginx/sites-enabled/
sudo nginx -t          # Test configuration
sudo systemctl reload nginx
The four essential proxy headers explained:
Host $host— passes the original domain name to the backend (critical for virtual hosting)X-Real-IP $remote_addr— tells the backend the actual client IP, not Nginx’s IPX-Forwarded-For $proxy_add_x_forwarded_for— appends the client IP to the forwarding chain (important when multiple proxies are involved)X-Forwarded-Proto $scheme— tells the backend whether the original request was HTTP or HTTPS (critical for redirect URLs and cookie security)
Without these headers, your backend sees every request as coming from 127.0.0.1 over plain HTTP. That breaks logging, rate limiting, session management, and half of your application logic.
Step 3: SSL/TLS Termination with Let’s Encrypt
The most common reason to use Nginx as a reverse proxy is SSL termination. Your backend speaks plain HTTP on localhost, Nginx handles all the HTTPS complexity.
# Install Certbot
sudo apt install certbot python3-certbot-nginx -y

# Get a certificate (Nginx plugin handles everything)
sudo certbot --nginx -d myapp.example.com
Certbot modifies your Nginx config automatically. The result looks like this:
server {
    listen 443 ssl http2;
    server_name myapp.example.com;

    ssl_certificate /etc/letsencrypt/live/myapp.example.com/fullchain.pem;
    ssl_certificate_key /etc/letsencrypt/live/myapp.example.com/privkey.pem;
    ssl_protocols TLSv1.2 TLSv1.3;
    ssl_ciphers HIGH:!aNULL:!MD5;
    ssl_prefer_server_ciphers on;
    ssl_session_cache shared:SSL:10m;
    ssl_session_timeout 10m;

    location / {
        proxy_pass http://127.0.0.1:3000;
        proxy_set_header Host $host;
        proxy_set_header X-Real-IP $remote_addr;
        proxy_set_header X-Forwarded-For $proxy_add_x_forwarded_for;
        proxy_set_header X-Forwarded-Proto $scheme;
    }
}

server {
    listen 80;
    server_name myapp.example.com;
    return 301 https://$host$request_uri;
}
Production SSL tips we learned the hard way:
- Always include
ssl_session_cache— without it, every connection does a full TLS handshake, which is expensive - Use
TLSv1.2 TLSv1.3only — TLS 1.0 and 1.1 are deprecated and insecure - Set up a cron for
certbot renew(Certbot usually does this automatically, but verify withsudo certbot renew --dry-run)
Step 4: Multiple Backend Services
Real-world setups rarely have just one backend. Here is how to proxy multiple services on the same domain:
server {
    listen 443 ssl http2;
    server_name example.com;

    # Frontend (Next.js on port 3000)
    location / {
        proxy_pass http://127.0.0.1:3000;
        proxy_set_header Host $host;
        proxy_set_header X-Real-IP $remote_addr;
        proxy_set_header X-Forwarded-For $proxy_add_x_forwarded_for;
        proxy_set_header X-Forwarded-Proto $scheme;
    }

    # API (Express on port 4000)
    location /api/ {
        proxy_pass http://127.0.0.1:4000;
        proxy_set_header Host $host;
        proxy_set_header X-Real-IP $remote_addr;
        proxy_set_header X-Forwarded-For $proxy_add_x_forwarded_for;
        proxy_set_header X-Forwarded-Proto $scheme;
    }

    # Admin panel (separate service on port 9000)
    location /admin/ {
        proxy_pass http://127.0.0.1:9000/;
        proxy_set_header Host $host;
        proxy_set_header X-Real-IP $remote_addr;
        proxy_set_header X-Forwarded-For $proxy_add_x_forwarded_for;
        proxy_set_header X-Forwarded-Proto $scheme;
    }
}
Watch the trailing slash on proxy_pass! This is one of the most common Nginx mistakes:
proxy_pass http://127.0.0.1:9000;— passes the full URI including/admin/to the backendproxy_pass http://127.0.0.1:9000/;— strips/admin/and passes only the remainder
If your admin panel expects requests at / internally, you need the trailing slash. If it expects /admin/, you do not. Getting this wrong causes mysterious 404 errors.
Load Balancing with Nginx Reverse Proxy
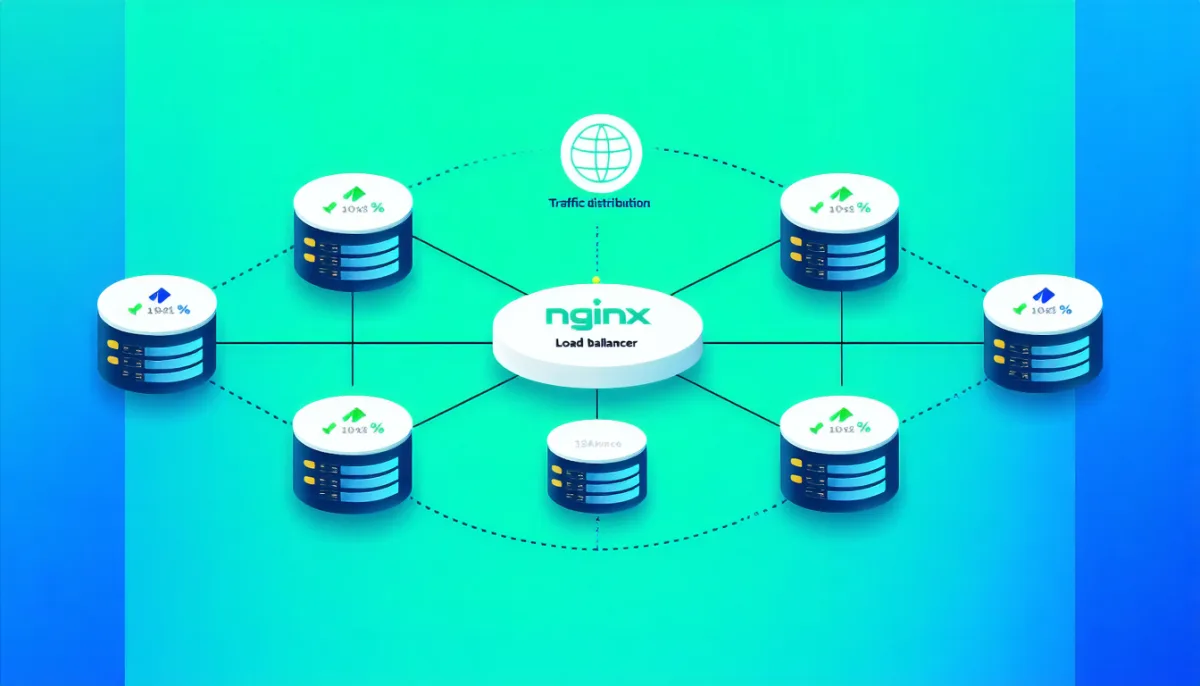
When one backend server is not enough, Nginx can distribute traffic across multiple instances.
Basic Load Balancing
upstream myapp_backend {
    server 127.0.0.1:3001;
    server 127.0.0.1:3002;
    server 127.0.0.1:3003;
}

server {
    listen 443 ssl http2;
    server_name myapp.example.com;

    location / {
        proxy_pass http://myapp_backend;
        proxy_set_header Host $host;
        proxy_set_header X-Real-IP $remote_addr;
        proxy_set_header X-Forwarded-For $proxy_add_x_forwarded_for;
        proxy_set_header X-Forwarded-Proto $scheme;
    }
}
By default, Nginx uses round-robin — requests are distributed evenly across all servers. But there are better options:
Load Balancing Algorithms
upstream myapp_backend {
    # Least connections — sends to the server with fewest active connections
    least_conn;

    server 127.0.0.1:3001 weight=3;  # Gets 3x more traffic
    server 127.0.0.1:3002 weight=1;
    server 127.0.0.1:3003 weight=1 backup;  # Only used when others are down
}
upstream myapp_backend {
# IP hash — same client always goes to same server (sticky sessions)
ip_hash;
server 127.0.0.1:3001;
server 127.0.0.1:3002;
server 127.0.0.1:3003;
}Our recommendation: Use least_conn for API backends (distributes load most evenly) and ip_hash only when your application requires sticky sessions (which it ideally should not — stateless backends scale better).
Health Checks
Nginx automatically marks a server as unavailable if it fails to respond:
upstream myapp_backend {
    server 127.0.0.1:3001 max_fails=3 fail_timeout=30s;
    server 127.0.0.1:3002 max_fails=3 fail_timeout=30s;
    server 127.0.0.1:3003 max_fails=3 fail_timeout=30s backup;
}
After 3 failed requests, Nginx stops sending traffic to that server for 30 seconds, then tries again. Simple but effective.
WebSocket Support
WebSockets require special handling because they upgrade the HTTP connection to a persistent, bidirectional channel. Without proper configuration, WebSocket connections will fail through your Nginx reverse proxy.
location /ws/ {
    proxy_pass http://127.0.0.1:3000;
    proxy_http_version 1.1;
    proxy_set_header Upgrade $http_upgrade;
    proxy_set_header Connection "upgrade";
    proxy_set_header Host $host;
    proxy_set_header X-Real-IP $remote_addr;
    proxy_read_timeout 86400s;  # Keep WebSocket alive for 24h
    proxy_send_timeout 86400s;
}
The three critical lines:
proxy_http_version 1.1— WebSockets require HTTP/1.1 (HTTP/1.0 does not support the Upgrade mechanism)proxy_set_header Upgrade $http_upgrade— passes the Upgrade header from the clientproxy_set_header Connection "upgrade"— tells the backend to switch protocols
Without proxy_read_timeout, Nginx closes idle WebSocket connections after 60 seconds (the default). Set it to something long enough for your use case.
Caching: Making Your Reverse Proxy Fast
One of Nginx’s most powerful features as a reverse proxy is response caching. Instead of forwarding every request to the backend, Nginx can serve cached responses directly — reducing backend load and improving response times dramatically.
Basic Proxy Cache Setup
# In http {} block (nginx.conf)
proxy_cache_path /var/cache/nginx levels=1:2 keys_zone=my_cache:10m
                 max_size=1g inactive=60m use_temp_path=off;

# In server {} or location {} block
location / {
    proxy_cache my_cache;
    proxy_cache_valid 200 302 10m;
    proxy_cache_valid 404 1m;
    proxy_cache_use_stale error timeout updating http_500 http_502 http_503 http_504;
    proxy_cache_lock on;

    add_header X-Cache-Status $upstream_cache_status;

    proxy_pass http://127.0.0.1:3000;
}
Key directives explained:
proxy_cache_valid 200 302 10m— cache successful responses for 10 minutesproxy_cache_use_stale— serve stale cached content when the backend is down (this is a lifesaver in production)proxy_cache_lock on— when multiple requests hit the same uncached URL simultaneously, only one goes to the backend; the rest wait for the cache to be filledX-Cache-Statusheader — lets you verify caching is working (values: HIT, MISS, BYPASS, EXPIRED, STALE)
Selective Caching
Not everything should be cached. Dynamic, user-specific content needs to bypass the cache:
location / {
    proxy_cache my_cache;

    # Do not cache requests with cookies (likely authenticated)
    proxy_cache_bypass $http_cookie;
    proxy_no_cache $http_cookie;

    # Do not cache POST requests
    proxy_cache_methods GET HEAD;

    proxy_pass http://127.0.0.1:3000;
}

# API endpoints — no caching
location /api/ {
    proxy_pass http://127.0.0.1:4000;
    proxy_no_cache 1;
    proxy_cache_bypass 1;
}
Security Hardening for Your Nginx Reverse Proxy
A reverse proxy is your first line of defense. Here are the security configurations we use on every production deployment:

Security Headers
# Add to server {} block
add_header X-Frame-Options "SAMEORIGIN" always;
add_header X-Content-Type-Options "nosniff" always;
add_header X-XSS-Protection "1; mode=block" always;
add_header Referrer-Policy "strict-origin-when-cross-origin" always;
add_header Strict-Transport-Security "max-age=31536000; includeSubDomains" always;
add_header Permissions-Policy "camera=(), microphone=(), geolocation=()" always;
Rate Limiting
Protect your backend from abuse:
# In http {} block
limit_req_zone $binary_remote_addr zone=api_limit:10m rate=10r/s;
limit_req_zone $binary_remote_addr zone=login_limit:10m rate=1r/s;

# In location {} blocks
location /api/ {
    limit_req zone=api_limit burst=20 nodelay;
    proxy_pass http://127.0.0.1:4000;
}

location /auth/login {
    limit_req zone=login_limit burst=5;
    proxy_pass http://127.0.0.1:4000;
}
Request Size Limits
Prevent oversized uploads from crashing your backend:
client_max_body_size 10m;          # Maximum upload size
client_body_buffer_size 128k;      # Buffer for request bodies
proxy_buffer_size 4k;              # Buffer for response headers
proxy_buffers 4 32k;               # Buffers for response body
proxy_busy_buffers_size 64k;
Hide Backend Information
proxy_hide_header X-Powered-By;
proxy_hide_header Server;
server_tokens off;
Performance Tuning
These optimizations make a measurable difference under real traffic:
Connection Keepalive to Backend
By default, Nginx opens a new connection to the backend for every request. For high-traffic setups, this is wasteful:
upstream myapp_backend {
    server 127.0.0.1:3000;
    keepalive 32;  # Keep 32 idle connections open per worker
}

location / {
    proxy_pass http://myapp_backend;
    proxy_http_version 1.1;
    proxy_set_header Connection "";  # Required for keepalive to upstream
}
Gzip Compression
gzip on;
gzip_vary on;
gzip_proxied any;
gzip_comp_level 6;
gzip_min_length 1000;
gzip_types text/plain text/css application/json application/javascript
           text/xml application/xml application/xml+rss text/javascript
           image/svg+xml;
Timeouts (Sensible Defaults)
proxy_connect_timeout 5s;     # Time to establish connection to backend
proxy_send_timeout 60s;       # Time to send request to backend
proxy_read_timeout 60s;       # Time to read response from backend
send_timeout 60s;             # Time to send response to client
Do not set timeouts too high. A 300-second proxy_read_timeout means a stuck backend ties up client connections for five minutes. For most APIs, 30-60 seconds is reasonable. Long-running operations should use WebSockets or polling instead.
Docker and Container Setups
In containerized environments, Nginx reverse proxy configurations look slightly different:
Docker Compose Example
version: '3.8'
services:
  nginx:
    image: nginx:alpine
    ports:
      - "80:80"
      - "443:443"
    volumes:
      - ./nginx.conf:/etc/nginx/conf.d/default.conf
      - ./certs:/etc/nginx/certs
    depends_on:
      - app
    networks:
      - webnet

  app:
    build: .
    expose:
      - "3000"   # Not published to host — only accessible within Docker network
    networks:
      - webnet

networks:
  webnet:
In the Nginx config, use the service name as the upstream:
upstream app {
    server app:3000;   # Docker DNS resolves the service name
}

server {
    listen 80;
    location / {
        proxy_pass http://app;
    }
}
Important for Docker: The backend port uses expose, not ports. With ports: "3000:3000", the backend is also directly accessible from the internet, bypassing your reverse proxy entirely. With expose, only containers on the same Docker network can reach it.
Nginx vs Caddy vs Traefik: When to Choose What
Nginx is not the only reverse proxy option in 2026. Here is an honest comparison:
| Feature | Nginx | Caddy | Traefik |
|---|---|---|---|
| Automatic HTTPS | No (needs Certbot) | Yes (built-in) | Yes (built-in) |
| Config format | Custom syntax | Caddyfile (simple) | YAML/TOML/Labels |
| Docker integration | Manual | Good | Excellent |
| Performance | Excellent | Very good | Good |
| Learning curve | Moderate | Low | Moderate |
| Community/Ecosystem | Massive | Growing | Large |
| Production track record | Decades | Years | Years |
Our take: For simple setups with automatic HTTPS, Caddy is genuinely easier. For Docker/Kubernetes with dynamic service discovery, Traefik shines. For everything else — high traffic, complex routing, maximum performance, custom modules — Nginx remains the standard. We actually use Caddy for some of our own projects now, but Nginx is still what we reach for on high-stakes deployments. For a detailed comparison with our own benchmark, see Caddy vs Nginx.
Troubleshooting Common Nginx Reverse Proxy Issues
502 Bad Gateway
The most common error. It means Nginx cannot reach the backend.
Check:
- Is the backend actually running?
curl http://127.0.0.1:3000 - Is the port correct in your
proxy_pass? - Are there firewall rules blocking localhost connections?
- Check
sudo tail -f /var/log/nginx/error.log
504 Gateway Timeout
Nginx connected to the backend but the backend took too long to respond.
Fix: Increase proxy_read_timeout — but also fix your slow backend:
location /slow-endpoint {
    proxy_read_timeout 120s;
    proxy_pass http://127.0.0.1:3000;
}
Mixed Content / Redirect Loops
Usually caused by missing X-Forwarded-Proto header. Your backend generates HTTP URLs because it does not know the original request was HTTPS.
Fix: Ensure proxy_set_header X-Forwarded-Proto $scheme; is set, AND your backend framework is configured to trust proxy headers.
413 Request Entity Too Large
The upload is bigger than client_max_body_size (default 1MB).
Fix: client_max_body_size 50m; in the relevant server or location block.
WebSocket Connection Drops After 60 Seconds
Default proxy_read_timeout is 60 seconds. Idle WebSocket connections get killed.
Fix: Increase proxy_read_timeout to your desired connection lifetime.
Complete Production Configuration Template
Here is a full, production-ready Nginx reverse proxy configuration that we actually use:
# /etc/nginx/sites-available/production-app
upstream app_backend {
    least_conn;
    server 127.0.0.1:3001 max_fails=3 fail_timeout=30s;
    server 127.0.0.1:3002 max_fails=3 fail_timeout=30s;
    keepalive 32;
}

server {
    listen 80;
    server_name app.example.com;
    return 301 https://$host$request_uri;
}

server {
    listen 443 ssl http2;
    server_name app.example.com;

    # SSL
    ssl_certificate /etc/letsencrypt/live/app.example.com/fullchain.pem;
    ssl_certificate_key /etc/letsencrypt/live/app.example.com/privkey.pem;
    ssl_protocols TLSv1.2 TLSv1.3;
    ssl_ciphers ECDHE-ECDSA-AES128-GCM-SHA256:ECDHE-RSA-AES128-GCM-SHA256:ECDHE-ECDSA-AES256-GCM-SHA384:ECDHE-RSA-AES256-GCM-SHA384;
    ssl_prefer_server_ciphers off;
    ssl_session_cache shared:SSL:10m;
    ssl_session_timeout 1d;
    ssl_session_tickets off;

    # Security headers
    add_header X-Frame-Options "SAMEORIGIN" always;
    add_header X-Content-Type-Options "nosniff" always;
    add_header Strict-Transport-Security "max-age=63072000; includeSubDomains; preload" always;
    add_header Referrer-Policy "strict-origin-when-cross-origin" always;

    # Logging
    access_log /var/log/nginx/app-access.log;
    error_log /var/log/nginx/app-error.log;

    # Limits
    client_max_body_size 25m;
    server_tokens off;

    # Compression
    gzip on;
    gzip_vary on;
    gzip_proxied any;
    gzip_comp_level 6;
    gzip_types text/plain text/css application/json application/javascript
               text/xml application/xml text/javascript image/svg+xml;

    # Main application
    location / {
        proxy_pass http://app_backend;
        proxy_http_version 1.1;
        proxy_set_header Connection "";
        proxy_set_header Host $host;
        proxy_set_header X-Real-IP $remote_addr;
        proxy_set_header X-Forwarded-For $proxy_add_x_forwarded_for;
        proxy_set_header X-Forwarded-Proto $scheme;

        proxy_connect_timeout 5s;
        proxy_send_timeout 60s;
        proxy_read_timeout 60s;
    }

    # WebSocket endpoint
    location /ws {
        proxy_pass http://app_backend;
        proxy_http_version 1.1;
        proxy_set_header Upgrade $http_upgrade;
        proxy_set_header Connection "upgrade";
        proxy_set_header Host $host;
        proxy_set_header X-Real-IP $remote_addr;
        proxy_read_timeout 86400s;
    }

    # Static assets — serve directly, bypass proxy
    location /static/ {
        alias /var/www/app/static/;
        expires 30d;
        add_header Cache-Control "public, immutable";
    }
}
Frequently Asked Questions
Can Nginx act as a reverse proxy?
Absolutely. Nginx is one of the most widely used reverse proxies in the world. Its event-driven architecture makes it exceptionally efficient at handling thousands of proxied connections simultaneously. You configure it with the proxy_pass directive inside a location block, and it handles forwarding requests, managing connections, and returning responses.
How does Nginx work as a reverse proxy?
Nginx accepts incoming client connections and forwards them to backend servers based on your configuration rules. It uses non-blocking I/O to handle many connections with minimal resource usage. The client never communicates directly with your backend — Nginx acts as an intermediary that can add SSL, modify headers, cache responses, and distribute load across multiple servers.
Is Nginx better than Apache as a reverse proxy?
For the reverse proxy role specifically, yes. Nginx’s event-driven architecture handles concurrent connections more efficiently than Apache’s process-based model. It uses less memory under load and can handle more simultaneous connections. Apache can work as a reverse proxy with mod_proxy, but Nginx was designed for this use case from the ground up.
Can I use Nginx reverse proxy with Docker?
Yes, and it is one of the most common setups. You can run Nginx as a Docker container and use Docker’s internal DNS to resolve service names as upstream servers. Alternatively, you can run Nginx on the host and proxy to containers via their published ports. For dynamic container environments, consider Traefik which has built-in Docker integration.
How do I secure my Nginx reverse proxy?
Start with SSL/TLS termination using Let’s Encrypt certificates. Add security headers (X-Frame-Options, Content-Security-Policy, HSTS). Enable rate limiting to prevent abuse. Set server_tokens off and hide backend headers with proxy_hide_header. Limit request sizes with client_max_body_size. Consider using allow/deny directives to restrict access to admin endpoints by IP.
Conclusion: Nginx Reverse Proxy Is the Foundation
Nginx as a reverse proxy is not glamorous. It is not the part of your stack that gets mentioned in blog posts or impresses investors. But it is the foundation that everything else sits on — the layer that handles SSL so your app does not have to, that balances load so one server crash does not take down your service, that caches responses so your database is not overwhelmed, and that provides a single point to enforce security policies.
The configuration we have covered in this guide — basic proxying, SSL termination, load balancing, WebSocket support, caching, and security hardening — covers 95 percent of real-world Nginx reverse proxy deployments. The remaining 5 percent involves specialized modules and edge cases that the Nginx documentation handles well once you understand the fundamentals.
Our practical recommendation: start with the simplest possible configuration (Step 2 above), add SSL (Step 3), then layer on caching, load balancing, and security hardening as your needs grow. Do not over-engineer your initial setup — a working simple config beats a broken complex one every single time.